|
The "Job Properties" dialog box controls all the job settings that can be modified in RIP-Queue.
- Select the image for which you want to set the Job Properties.
- 2. Click
 icon or double click / right click a job. This opens the "Job Properties" dialog (Figure 1). icon or double click / right click a job. This opens the "Job Properties" dialog (Figure 1).
- Set your options, and click [OK].
You can select following Job Properties tabs from the tree:
- Basic Properties
- This option (Figure 1) controls basic job settings like Job name, , , Cutter, Image Size, Number of copies, and Rotation. Use the various fields to set each option.
- Marks – This option (Figure 2) allows you to set Tile Marks such as [Tile Dotted Overlap] and [Zero-Line Marks] on your job. Use
 button for setting [Line Style]. button for setting [Line Style].
- Bleed – This option (Figure 3) allows you to add the bleeds to a job. Check [Enable Image Bleed] and set Bleed Setup, Trim Box, Bleed Type, , and Bleed Marks. See Bleed of Finishing for more information.
- Grommet – This option (Figure 4) allows you to add the grommet marks to a job. You can set Grommet Mark Placement, Grommet Mark Size, Spacing, and Grommet Mark Style. See Grommet of Finishing for more information.
- Marks
- This option (Figure 5) allows you to add the marks that will be used with your job. You can set Edge Marks ( mark, Crop mark, and Crop Out line mark), Sewing Marks, Print Label, and Contour Cut Paths. See Marks of Finishing for more information.
- Workflow
- This option (Figure 6) determines how RIP-Queue handles your job after processing and printing. See Workflow for more information.
- Job Ticket – This option (Figure 8) allows you to set job information such as Order number, Company and Customer name, Prints Due, Due Date, and Notes. See Job Ticket for more information.
- Info
- This option (Figure 8) lists information about your job such as the date the image was processed, ink usage, and size.
-
Named Colors – This option (Figure 9) lists named colors that are used in your job. To use this option, you need to enable [Use Replacement Table] check box in the [Basic Properties], Quick Sets, and Job Editor.
NOTE: Most of these options can be set using Quick Sets. Quick Sets apply these settings automatically to your jobs and help streamline your workflow.
|
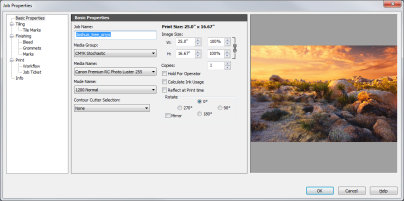
Figure 1
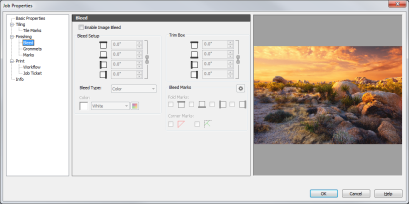
Figure 2
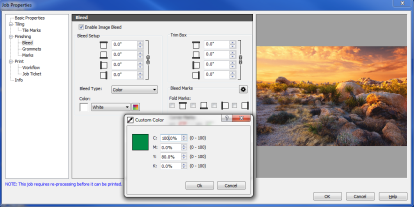
Figure 3
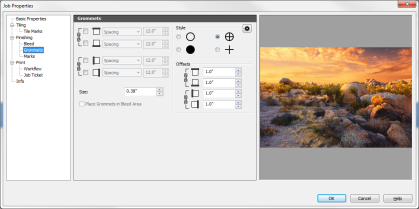
Figure 4
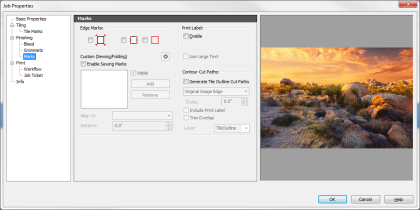
Figure 5
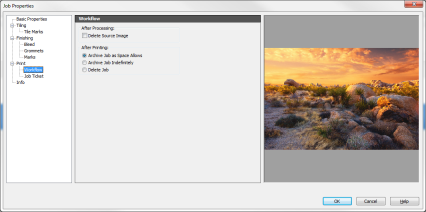
Figure 6
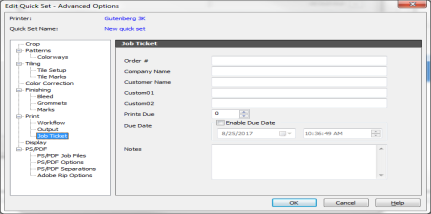
Figure 7
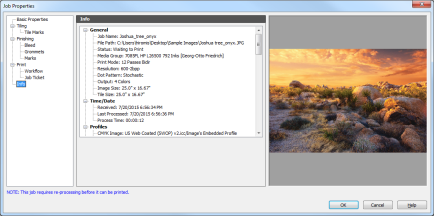
Figure 8
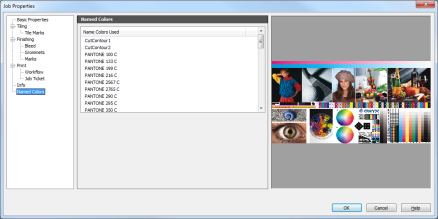
Figure 9
|
 Properties


 To set the [Job Properties]:
 button for setting [Line Style].